While you might worry that cleaning rocks for your aquarium is a daunting task, it’s actually straightforward and essential for the health of your tank.
You’ve picked out the perfect stones, but they’re not ready for your fish yet. To protect your aquatic pals from harmful bacteria and chemicals, you need to clean every rock thoroughly.
Start by rinsing them under running water to wash away any loose dirt. For more persistent grime, consider boiling the rocks or using a mild bleach solution, but remember to handle porous rocks carefully and rinse them well afterward.
By following these simple steps, you’ll create a safe and inviting environment for your underwater community.
## Key Takeaways
– Consider the impact of rocks on water pH and hardness when choosing rocks for an aquarium.
– Avoid rocks from highly polluted areas and those that easily crumble.
– Safe types of rocks for aquariums include slate, granite, quartz, petrified wood, and lava rock.
– Clean and prepare rocks properly before adding them to the aquarium to ensure they are safe for fish.
Why are rocks good for aquariums?
While you’re creating a home for your aquatic friends, it’s important to understand that rocks are beneficial for aquariums because they provide essential hiding spots and help mimic a natural environment. Incorporating various types of rocks, such as large aquarium rocks or porous rocks like lava rock, can enhance the aesthetic appeal and functionality of your aquatic setup.
Aquarium rocks serve as critical surfaces for beneficial bacteria to colonize. These bacteria are instrumental in maintaining the nitrogen cycle, which helps keep the water clean and safe for your fish.In this sense, these rocks can be used as a part of biological filtration.
Live aquarium rock, which is often used in saltwater tanks, comes with its own set of beneficial microorganisms. When you’re selecting rocks for an aquarium, you’re not just adding decoration. You’re creating a living system that supports the health of your tank’s ecosystem.
Many fish species, especially those that are naturally found in rocky habitats, appreciate having hiding spots. Rocks can provide caves, crevices, and overhangs for fish to retreat and feel secure.
Aquarium rocks are also vital for some fishes to breed. Fishes use rocks for shelter for laying eggs or to mark territory. Gourmis,Plecos,catfish and cichlids are just a few species that prefer rocks to breed.
What are the Best Rocks for an Aquarium?
You’ll want to be selective when picking out rocks for your aquarium to ensure they’re safe for your aquatic friends. It’s crucial to steer clear of rocks that can alter the water chemistry, like those high in carbonate.
Before you add them to your tank, properly preparing new rocks is a must to avoid introducing any unwanted substances.
Choosing Safe Rocks for Your Aquarium
When selecting rocks for your aquarium, it’s crucial to opt for types that won’t alter the water’s pH or hardness, such as slate or granite. Granite aquarium rocks are a popular choice because they’re inert and won’t release any minerals into the water. However, you should avoid carbonate rocks, like limestone, which can cause your water to fizz and become harder when you prepare rocks for an aquarium.
When choosing rocks for your aquarium, it is important to select ones that are safe for your fish and won’t alter the water chemistry. Here are some safe rock options for your aquarium:
1. Quartz: Quartz rocks are inert and do not affect the pH of the water. They are a popular choice for aquariums and come in various colors and sizes.
2. Slate: Slate rocks are also inert and safe for aquariums. They provide a natural and textured look to your tank.
3. Basalt: Basalt rocks are non-toxic and won’t affect the water chemistry. They are dark-colored and can add a beautiful contrast to your aquarium.
4. Lava Rock: Lava rocks are porous and provide a lot of surface area for beneficial bacteria to grow. They are safe for aquariums and can be used as biological filter media.
5. Seiryu Stone: Seiryu stone is a type of limestone that is safe for aquariums. It has a unique texture and adds a natural and rugged look to your tank.
To ensure the rocks are safe to use, perform a simple acid test: place a drop of vinegar on the rock, and if it fizzes, it’s likely unsafe for your aquarium. River rock is often safe to use, but always clean it thoroughly before adding to your tank.
Live rock aquarium setups require specific care and are generally safe, as they come from marine environments and are intended for aquarium use.
Types of Rocks to Avoid in an Aquarium
While rocks in the fish tank have benefits, not all rock types are good to pu them into your aquarium. These rocks will interrupt the quality and chemistry of the water. Here are rocks to avoid and why
1. Limestone: Limestone rocks can release calcium carbonate into the water, leading to an increase in pH levels and hardness. This can be harmful to certain fish species that prefer soft water.
2. Shale: Shale rocks have a tendency to break apart easily, which can result in sharp edges or small fragments that may harm fish or damage delicate fins.
3. Sandstone: Sandstone can be crumbly and prone to breaking down, causing sediment and particles to cloud the water. Additionally, sandstone may contain iron or other minerals that can alter the water chemistry.
4. Granite: While granite is generally considered safe for aquariums, some types may contain trace elements of heavy metals, such as copper or lead, which can be toxic to fish.
5. Pumice: Pumice is a lightweight volcanic floating rock. It can also have a rough texture, which may harm fish with delicate skin or scales.
6. Slate: While slate is often used in aquariums, it can sometimes contain high levels of iron or other minerals, which can affect the water chemistry. It is important to test and monitor the water parameters if using slate.
7. Rocks with sharp edges: Avoid using any rocks with sharp edges or jagged surfaces as they can potentially injure fish or damage their fins.
Preparing New Rocks for Aquarium Use
Before introducing new rocks into your aquarium, it’s crucial to select types that won’t disrupt your water’s chemistry, such as inert options like slate or quartz. These make excellent aquarium rock decorations, but even these must be properly sterilized.
Begin by thoroughly rinsing the rocks. To clean rock surfaces, consider boiling them, but only if they’re not porous. For more effective cleaning, soak the rocks in a bleach solution, ensuring you fully submerge them. Afterward, rinse them well and let them sit in a hydrogen peroxide solution to neutralize any remaining bleach.
Before you add rocks to an aquarium, give them a final rinse in non-chlorinated water. This careful preparation ensures your aquatic environment remains both beautiful and safe for its inhabitants.
Checking the Carbonate Content of Rocks
After sterilizing aquarium rocks, you’ll need to check their carbonate content to ensure they won’t alter your tank’s pH levels. To maintain the delicate balance of your aquarium, it’s crucial to select rocks that complement the substrate in your aquarium without disrupting the water chemistry.
When cleaning rock for aquascaping, avoid rocks high in carbonates like limestone or marble. They can leach into the water, raising hardness and pH.
Before adding them to your tank, scrub the clean rocks with a brush and rinse thoroughly. If you’ve used hydrogen peroxide for sterilizing, make sure to rinse the gravel in a clean container until it’s free of any chemical residue.
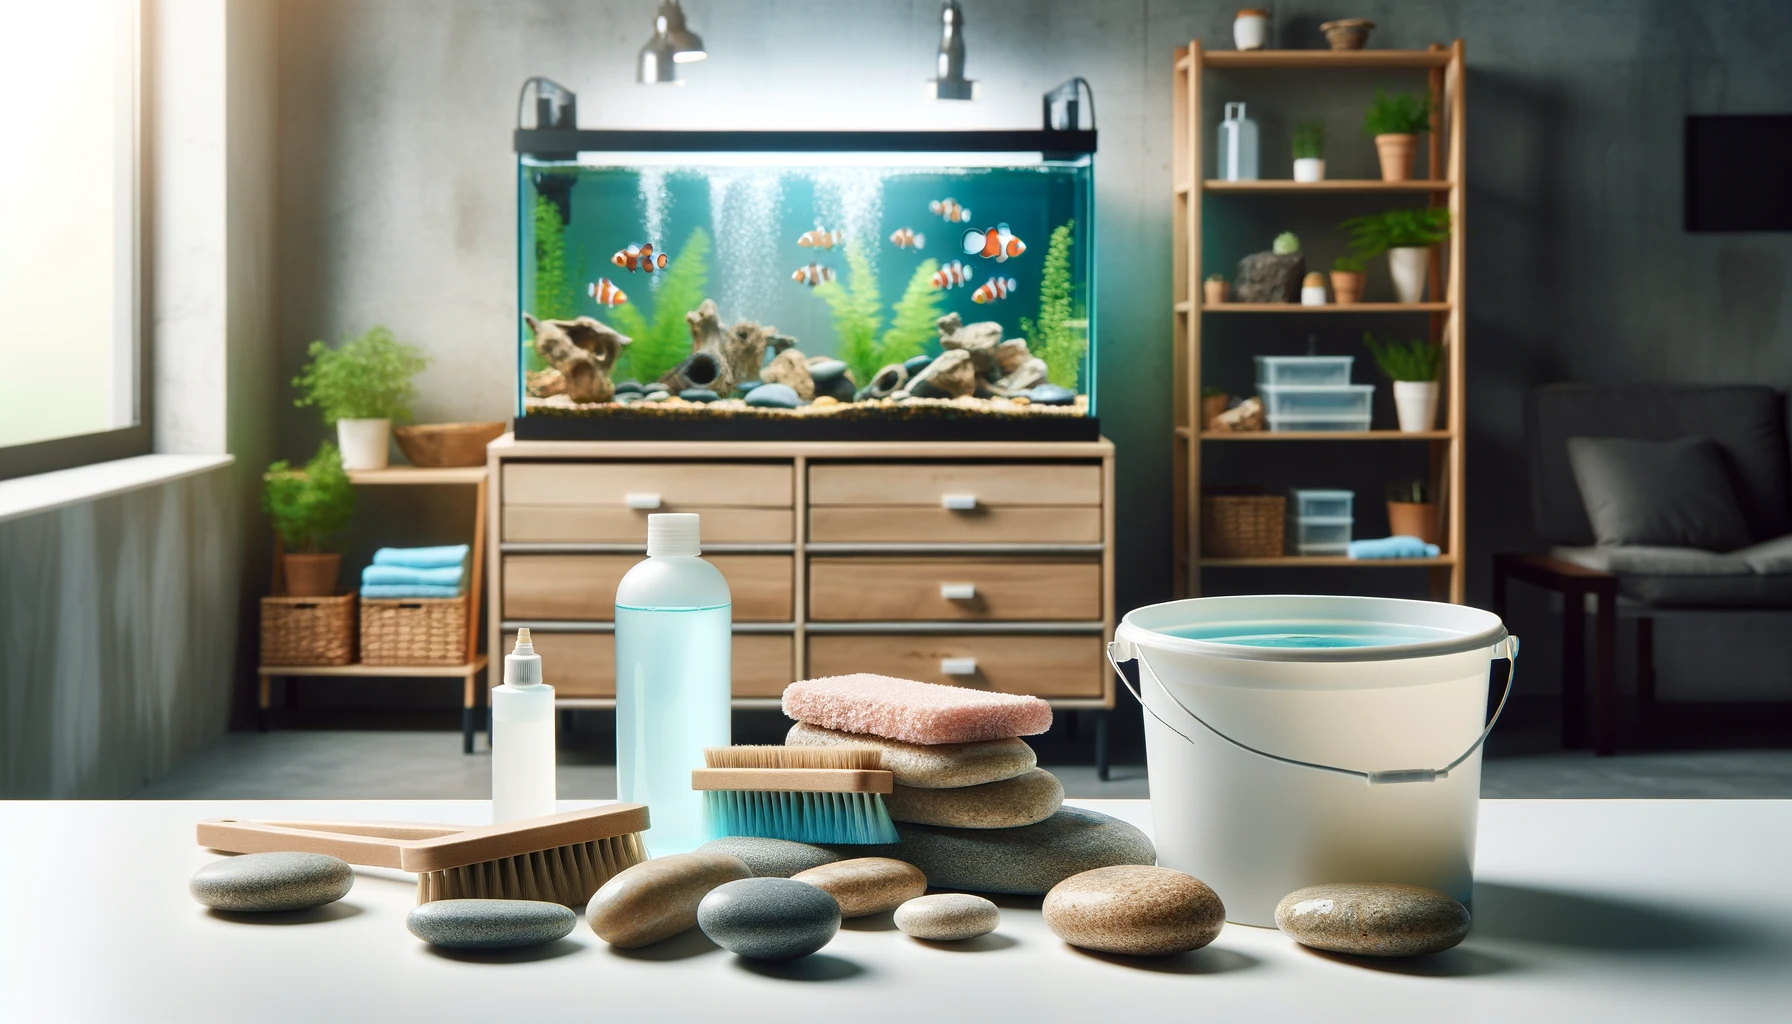
How to Clean Aquarium Rocks Properly?
Before adding rocks to your aquarium, you’ll need to clean them thoroughly to ensure they’re safe for your aquatic life.
Start by rinsing the rocks to remove loose debris, and then scrub off any algae that might be clinging to them.
If you’re wondering whether boiling is necessary, it can be a useful method for non-porous rocks, but let’s explore that and other cleaning agents like peroxide and bleach solutions in more detail.
Rinsing Rocks Before Adding
To ensure your aquarium’s health, you’ll need to thoroughly rinse any new rocks with non-chlorinated water before introducing them to your tank. If you’re cleaning rocks with hydrogen peroxide, make sure to rinse them completely to remove any residual chemicals. Avoid using tap water directly, as it may contain chlorine that’s harmful to your fish.
After you clean aquarium rocks, let the rocks air dry. This step is crucial to ensure no unwanted substances make their way into your aquatic environment.
When you’re ready to place the rocks in your aquarium, carefully remove the gravel and set it aside. Then, gently position your cleaned rocks, avoiding any sharp edges that might harm your aquatic friends.
Lastly, cleaning the gravel separately ensures that your entire substrate is free from debris and contaminants.
Scrubbing Algae from Aquarium Rocks
You’ll need to tackle algae buildup on your aquarium rocks to keep them looking pristine and ensure a healthy environment for your fish. Algae growth can be stubborn, but with proper aquarium maintenance, you can get your rocks clean.
Start by scrubbing algae from aquarium rocks manually, using a stiff brush. For tougher algae, consider the bleach method. Soak the rocks in a solution of water and a small amount of bleach, then scrub again.
Always rinse the rocks thoroughly to remove any bleach residue, as using bleach carelessly can harm your fish. Alternatively, use peroxide for a gentler approach.
After any chemical use, ensure the rocks are thoroughly clean before returning them to your clean aquarium to keep your fish tank rocks safe for your aquatic friends.
Should you boil rocks before putting in aquarium?
While scrubbing algae off your aquarium rocks is a crucial step in maintenance, you may also wonder if boiling them is a necessary measure for ensuring they’re safe and clean for your tank.
Boiling is indeed the best way to clean non-porous aquarium river rocks, as it can eradicate harmful bacteria. However, don’t use this method for porous rocks or those sensitive to heat, as they might crack. Instead, you can use a bleach solution to soak the rocks thoroughly.
Make sure they’re submerged in the bleach solution for a prescribed time, then rinse them well. If you’re cleaning gravel, using a gravel vacuum is effective to keep your tank clean without the need for boiling.
Always ensure the rocks are rinsed properly to maintain a safe environment for your fish.
Using Peroxide to Clean Aquarium Rocks
When cleaning your aquarium rocks, you can use hydrogen peroxide as an effective and safe alternative to harsh chemicals. This common household item is useful for keeping your tank maintenance routine environmentally friendly.
Start by removing your fish and any aquarium equipment. You’ll want to change the water partially, to prepare for a clean new hardscape. Clean your gravel by using a vacuum or a gravel vacuum specifically.
Apply hydrogen peroxide directly to the rocks, scrubbing gently to lift any algae or organic matter. Ensure the gravel is clean by rinsing it thoroughly with non-chlorinated water. When you siphon to remove the dirty water, be careful not to disturb your tank’s ecosystem.
Once the gravel dries, you can place it back, ensuring your aquarium remains clean and clear.
Applying Bleach Solution
Having cleaned your aquarium rocks with hydrogen peroxide, you may opt for a bleach solution to ensure they’re completely free of harmful organisms.
To do this safely, first remove your fish and other hardscape from the fish tank.
Prepare a mixture of bleach and water—usually, a ratio of 1 part bleach to 9 parts water is effective.
Soak the rocks in this solution for a short period, typically 10-15 minutes.
After soaking, thoroughly rinse the rocks in running water to remove all traces of chlorine.
If you’re using a siphon or vacuum to clean without removing aquarium water, ensure no bleach residue enters the tank.
To neutralize any remaining chlorine, you can use a tank cleaner specifically designed to make water safe for your aquatic pets.
Cleaning aquarium rocks with vinegar
Regularly, you’ll find that cleaning your aquarium rocks with vinegar is an effective method for removing mineral deposits and alga buildup. To keep your tank clean without damaging your aquarium, make sure to use a diluted vinegar solution.
Here’s how: remove the rocks from your tank, then soak them in a 1:1 solution of vinegar and water. After soaking, scrub the rocks gently to remove any remaining debris.
Before you put the fish back, rinse the rocks thoroughly with non-chlorinated water to ensure no vinegar residue is left. This process not only maintains the aesthetic of your fish aquarium but also contributes to the overall health of your tank.
When your tank needs a refresh, or you’re setting up a new aquarium, remember this simple yet effective cleaning technique.
Adding Rocks to an Aquarium
Once you’ve properly cleaned your chosen rocks, you’ll need to condition them by submerging them in aquarium water.
Before placing the rocks in, make sure you’ve vacuumed the aquarium gravel to prevent any buildup from affecting your setup.
It’s also crucial to monitor the alkalinity and pH levels as new rocks can alter the water chemistry, impacting your aquatic life.
Submerging Rocks in Aquarium Water for Conditioning
Before adding your cleaned rocks to the aquarium, you’ll need to submerge them in conditioned water for a period to ensure they’re safe for your aquatic environment. This step is crucial to create a stable environment for your fish.
If you’re either going to introduce many fish at once or just a single goldfish, you must take measures to keep your fish healthy.
The best way to tell if the rocks are ready is by soaking them, then testing the water parameters every two weeks. If the water remains stable, it’s likely safe to add the rocks to your tank.
However, if you detect changes, repeat this process—soak the rocks in conditioned water and let them sit. It’s the best way possible to remove any lingering contaminants.
Vacuum to Clean Aquarium Gravel Before Adding Rocks
To ensure the longevity of your aquarium’s cleanliness, you’ll need to vacuum the gravel thoroughly before adding any cleaned rocks. This step is crucial to remove any debris and waste that could compromise water quality.
If you have a small tank, temporarily rehome your fish to a safe container of treated water. Then, remove all accessories and use a gravel vacuum to clean the substrate.
For larger tanks, you can leave your fish in place while carefully maneuvering the siphon to avoid stress. In both cases, use a dedicated bucket for tank maintenance to prevent contamination.
Regularly cleaning your gravel this way helps maintain a healthy environment for your aquatic friends. Once the gravel is spotless, you can then place your prepped rocks into the tank.
Monitoring Alkalinity and pH Levels When Adding New Rocks
You’ll need to closely monitor the alkalinity and pH levels in your aquarium after adding new rocks to ensure they don’t disrupt your aquatic ecosystem. Certain rocks can alter the water chemistry, potentially harming your fish and plants.
Before you add them, test the rocks by placing them in a bucket of water to measure any changes in pH or hardness over a few days.
Once the rocks are in the tank, keep an eye on the pH and alkalinity with regular testing. If you notice significant shifts, you may need to remove the rocks or treat the water to stabilize these parameters.
Introducing Porous Rocks to Your Aquarium
Considering adding porous rocks to your aquarium, you must ensure they’re clean and safe for your aquatic life. Start by soaking the rocks in a bleach solution diluted with water—typically a ratio of one-part bleach to nine parts water works well.
After soaking, scrub them thoroughly to remove any debris or organic matter. It’s crucial to rinse the rocks multiple times with clean, non-chlorinated water to eliminate any bleach residue.
How often should you clean the rocks in the aquarium?
In maintaining a healthy aquarium, it’s essential to clean the rocks every 2-4 weeks to prevent waste buildup and ensure the well-being of your fish. Over time, uneaten food, fish waste, and other debris can accumulate, compromising water quality and potentially harming your aquatic pets.
If you’ve got a small tank, you’ll need to temporarily relocate your fish to a safe container with non-chlorinated water. After removing tank accessories, rinse the gravel thoroughly with treated water before placing it back in the tank.
For larger tanks, leave your fish where they are. Use a gravel siphon to clean the substrate, letting gravity help you remove the waste without disturbing your aquatic friends.
Regular maintenance of the gravel not only keeps your tank looking pristine but also supports a healthy environment for your fish. Remember to use non-chlorinated water for rinsing and consider replacing the gravel if it becomes excessively dirty or shows signs of damage.
You’ve mastered the art of rock prep for your aquarium! Remember, the right rocks enhance your tank’s look and health. Keep ’em clean with regular rinses and an occasional deep clean, as needed.
Stick to the routine, and your underwater world will thrive, dazzling all who gaze upon it.